
So I have been wanting to do a series like this for a while and finally had a good blog post to start out my series! I will be posting different blog posts “For Photographers” here and there. I’m excited to share any insight or advice I have that might help a fellow photographer!
My blog post on the Booth Progression last Thursday got my all-time second most hits (next to my announcement to stay home with Levi last year)! Part of this was because I posted it in two photography groups to encourage and share with other photographers how far we can come in the business if we work hard and strive for growth.
I got such a positive response from everyone! I got tons of questions from fellow photographers on how I actually built my wall. Well, I cannot claim the original idea to be my own, but from a fellow photographer in Birmingham, Alex Lucas, who had posted his in a Facebook photography group to share with us. He gave the basic information on what he used, and I went from there and did my own! Thanks Alex! In fact, his booth inspired at least one other girl, because she posted hers in the group this past weekend!
1) I went to Home Depot and purchased three hollow core doors without any pre-screwed holes or fixtures. These were 32″ long. I also considered getting four doors that were 28″ long, since they were almost the same size in length when put together; but decided that three would probably be easier than four to put together. You can get whatever size you need to fit into your booth. My booth was a 10×10 booth, and I wanted the wall to be close to 8ft long.
I took Alex’s advice to get the core door because they are hollow and light and easy to carry back and forth to set up the booth. This made carrying the wall super easy for set up and takedown!
Stock photo from Home Depot to show you what it looks like. Just a big piece of wood essentially, just a lot lighter since they are hollow. 
2) From there, I went and purchased some crown molding. I got the cheapest they had; but it worked out because I was really looking for something that was flat and at least 2-3 inches in width. Mine was 2.5″. I wanted something that could lay flat and provide some stability when I connected my doors together to make the wall. I got two 9ft pieces: one for the top and one for the bottom. I got an extra foot than I needed from each piece just in case we messed up when we cut it.
3) Ben, my assistant and second shooter, who helped me with all of the building of the wall, had the 1×4’s and wood screws we needed for the wall, so I didn’t actually purchase this stuff; but you will need something to be able to hold the doors up when you create the wall. Another photographer at the same bridal show as me had a VERY similar wall to mine. In fact, when I talked to her, I figured she had been in the same Facebook group as me because other than how our walls were held up in the back, we had the exact same wall displaying our pictures down to the velcro we used to hold up our pictures; however, she found hers on Pinterest. (Might have been yours Alex!)
Really, you can do this any way you want to create the supports for the wall. We chose to make “L” supports. I think Alex said he did something similar to this, but I have no idea how he actually constructed this part of his wall. The other photographer at the show bought large metal “L” brackets and then secured them to a flat piece of wood behind the wall. They both worked great! I will obviously be showing you how we did ours.
4) I went to the paint department with a swatch of my brand color and they helped me find one that best matched my color. I asked if I should buy a quart and if they thought it would be enough or if I would need a gallon (I have no idea about paint!) and he convinced me to buy the gallon. I didn’t use even half of it and the quart would have been fine; but I did end up using the paint for some other stuff for my office that I wanted to paint, so I guess it worked out.
I also painted the sides of the doors, even though this picture doesn’t show it completed yet. Wanted to make sure the seams between the doors looked clean and complete. I just propped them up in my garage and let them dry. My car got parked outside for a few days while I worked on this project. 🙂
 5) Ben made the “L” supports for the wall, so I wasn’t actually with him when he did it, but I can show you quite a few pictures of what he did and explain it. He took the 1×4’s and cut two pieces of wood into 18″ pieces. He also cut two pieces to be 9″ each and cut them at angles to make the securing parts of the frame. He used 4 wood screws on each side to secure them into place, so 8 screws in total were used for each “L” support.
Picture of all three supports lined up side by side against one door. We decided one per door would be enough to support the wall. Side view of supports with view of screws. There are no screws holding together the two 18″ pieces. Only the ones I mentioned above.
6) Ben then made the final support piece to slide the “L” support into on the wall. To make this final piece, he made two small triangle pieces and one rectangle piece. See the picture below to get measurements of the pieces.
You can’t really see the tall side of the triangle, but it is 3″ tall. Ben screwed the rectangle using two screws into the triangles and then took the triangles and screwed them directly into the door. 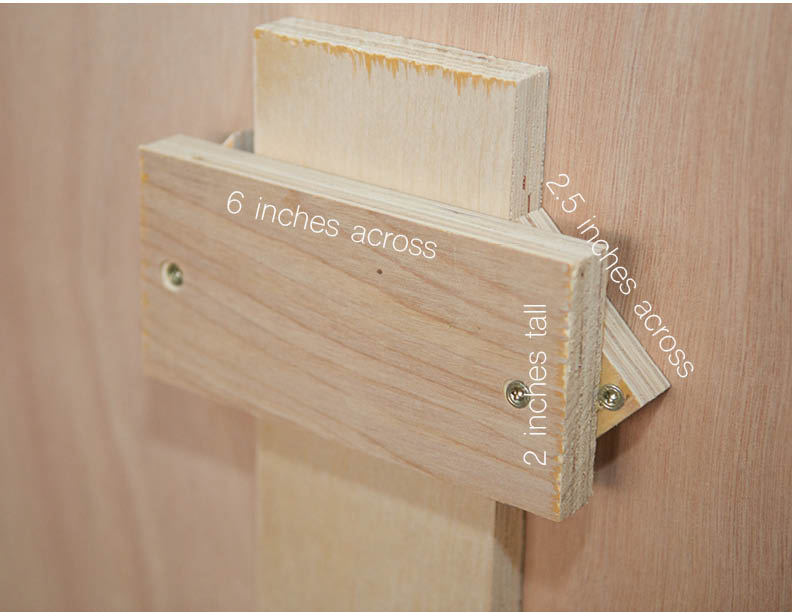
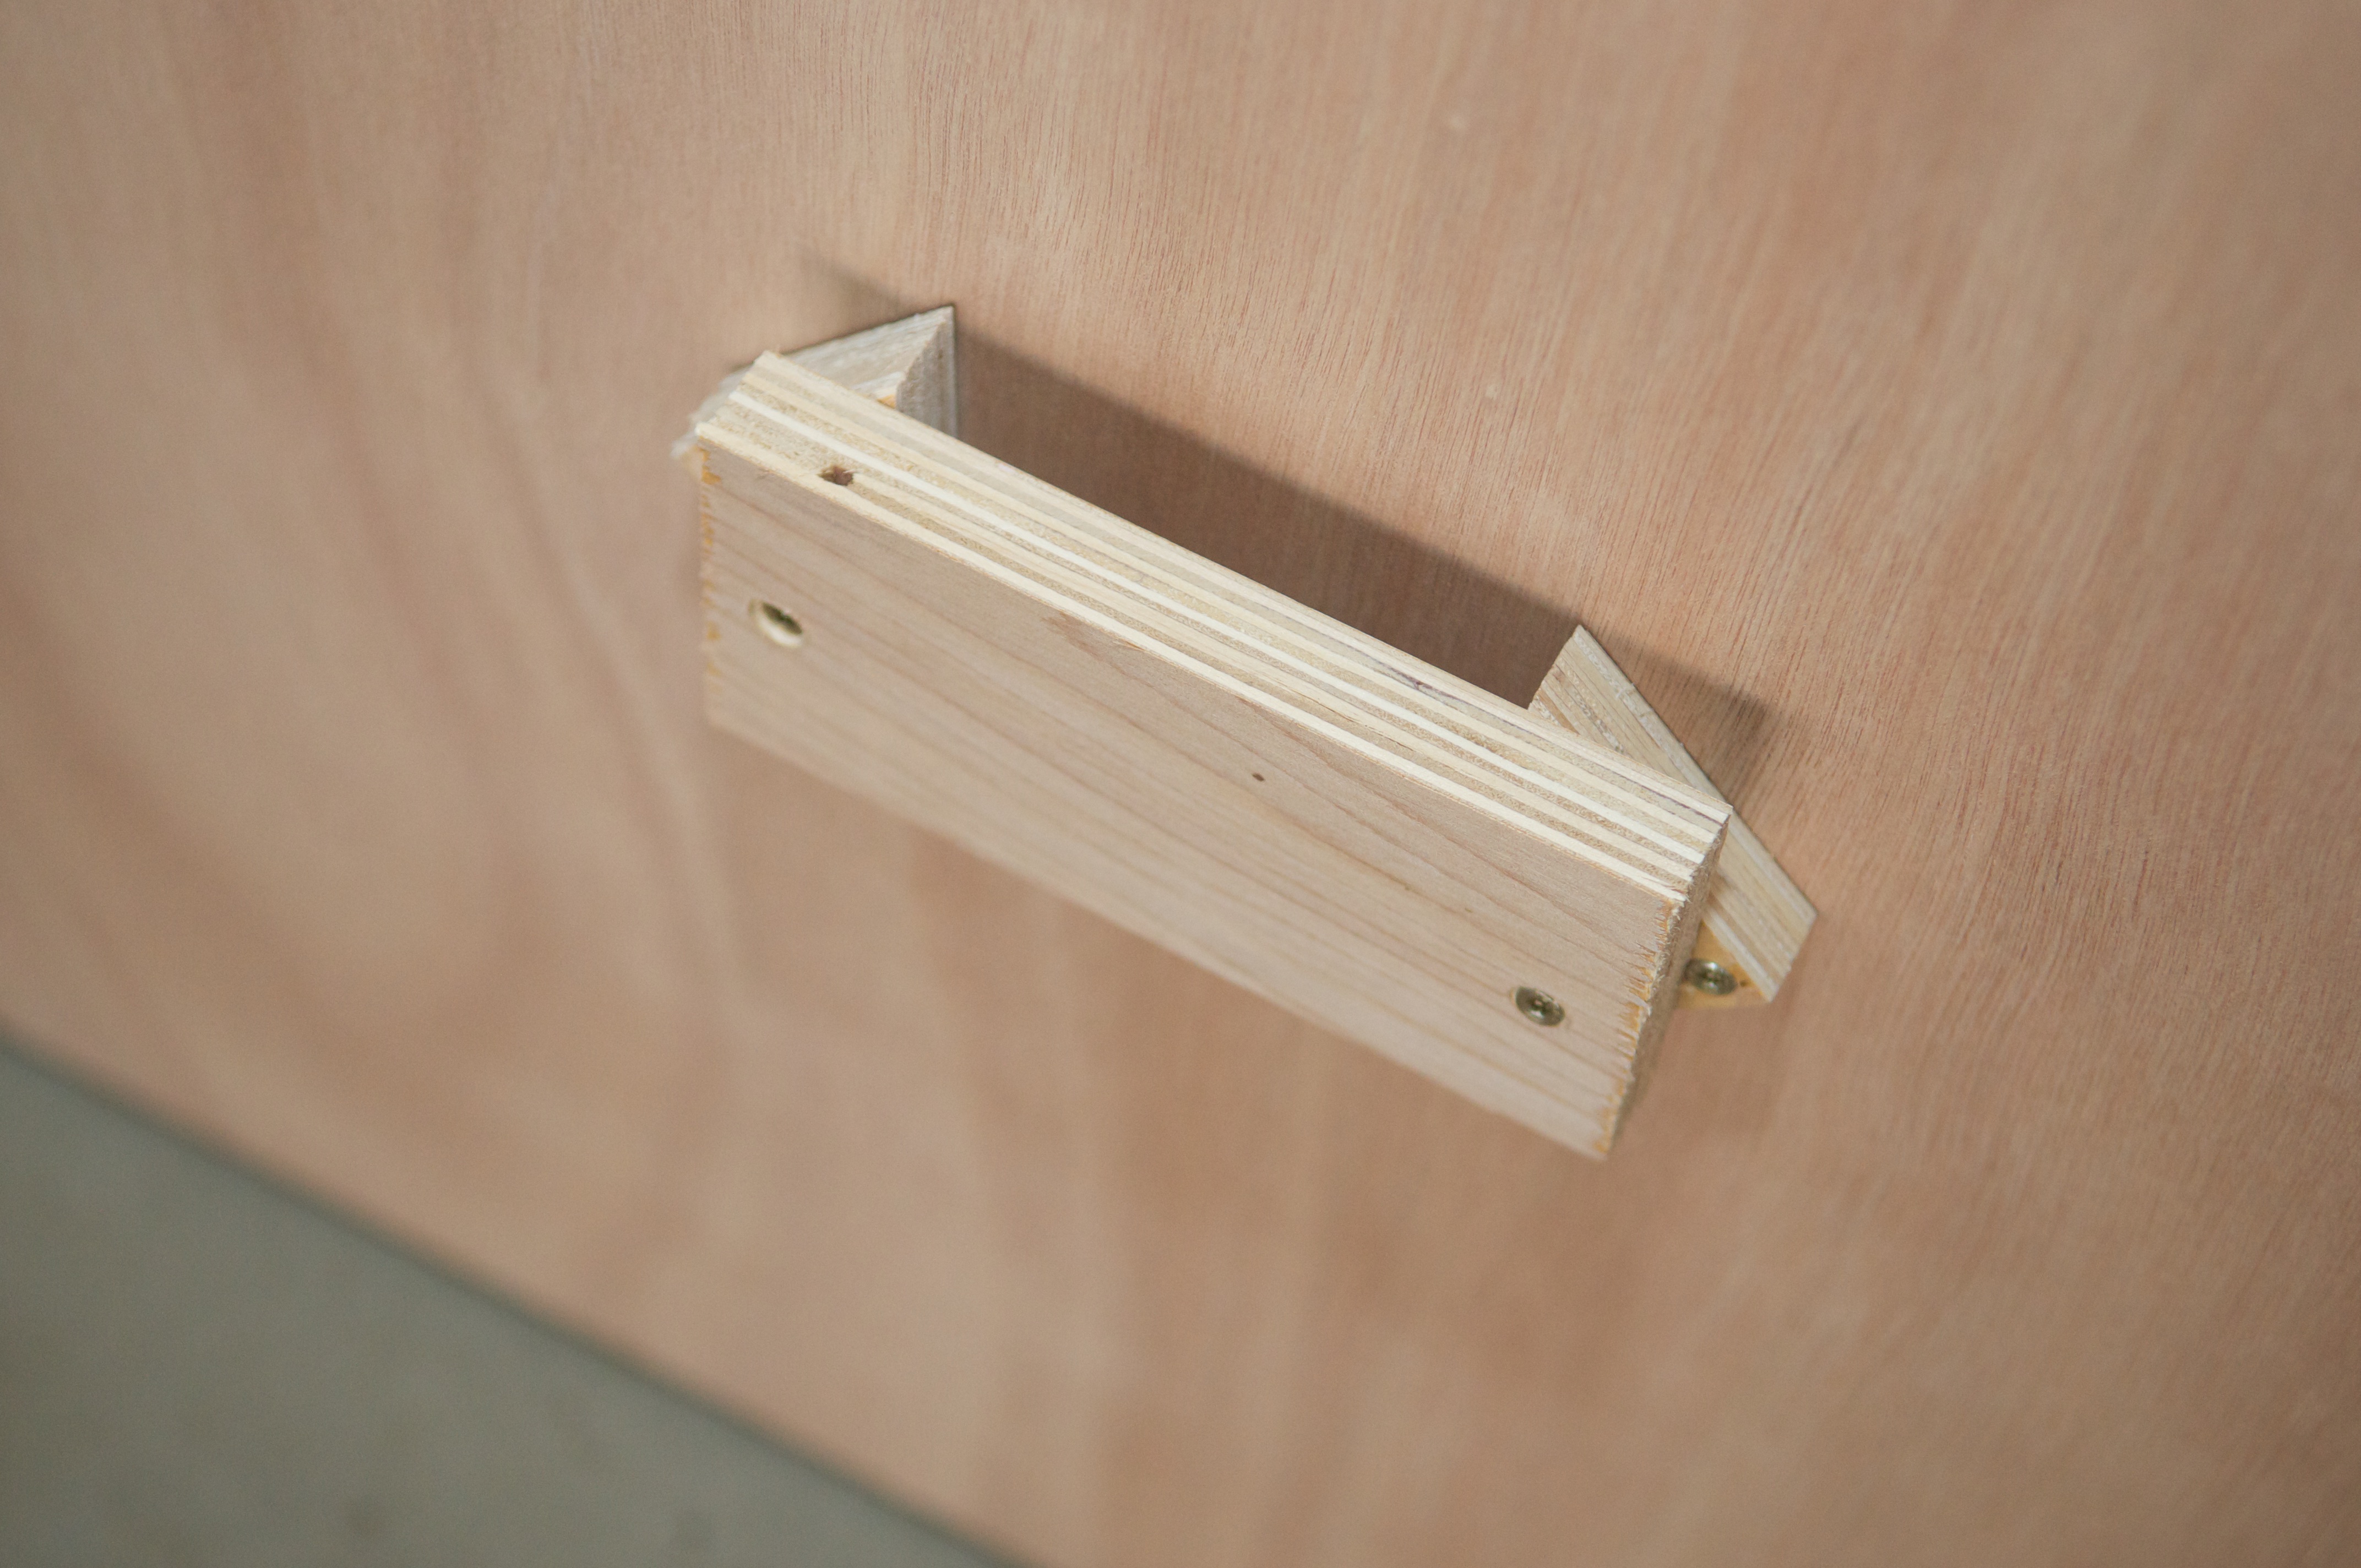 The “L” supports slipped in and out of this perfectly! It was awesome; and since the doors are so light, it was really easy to pick them up and slip them right in!
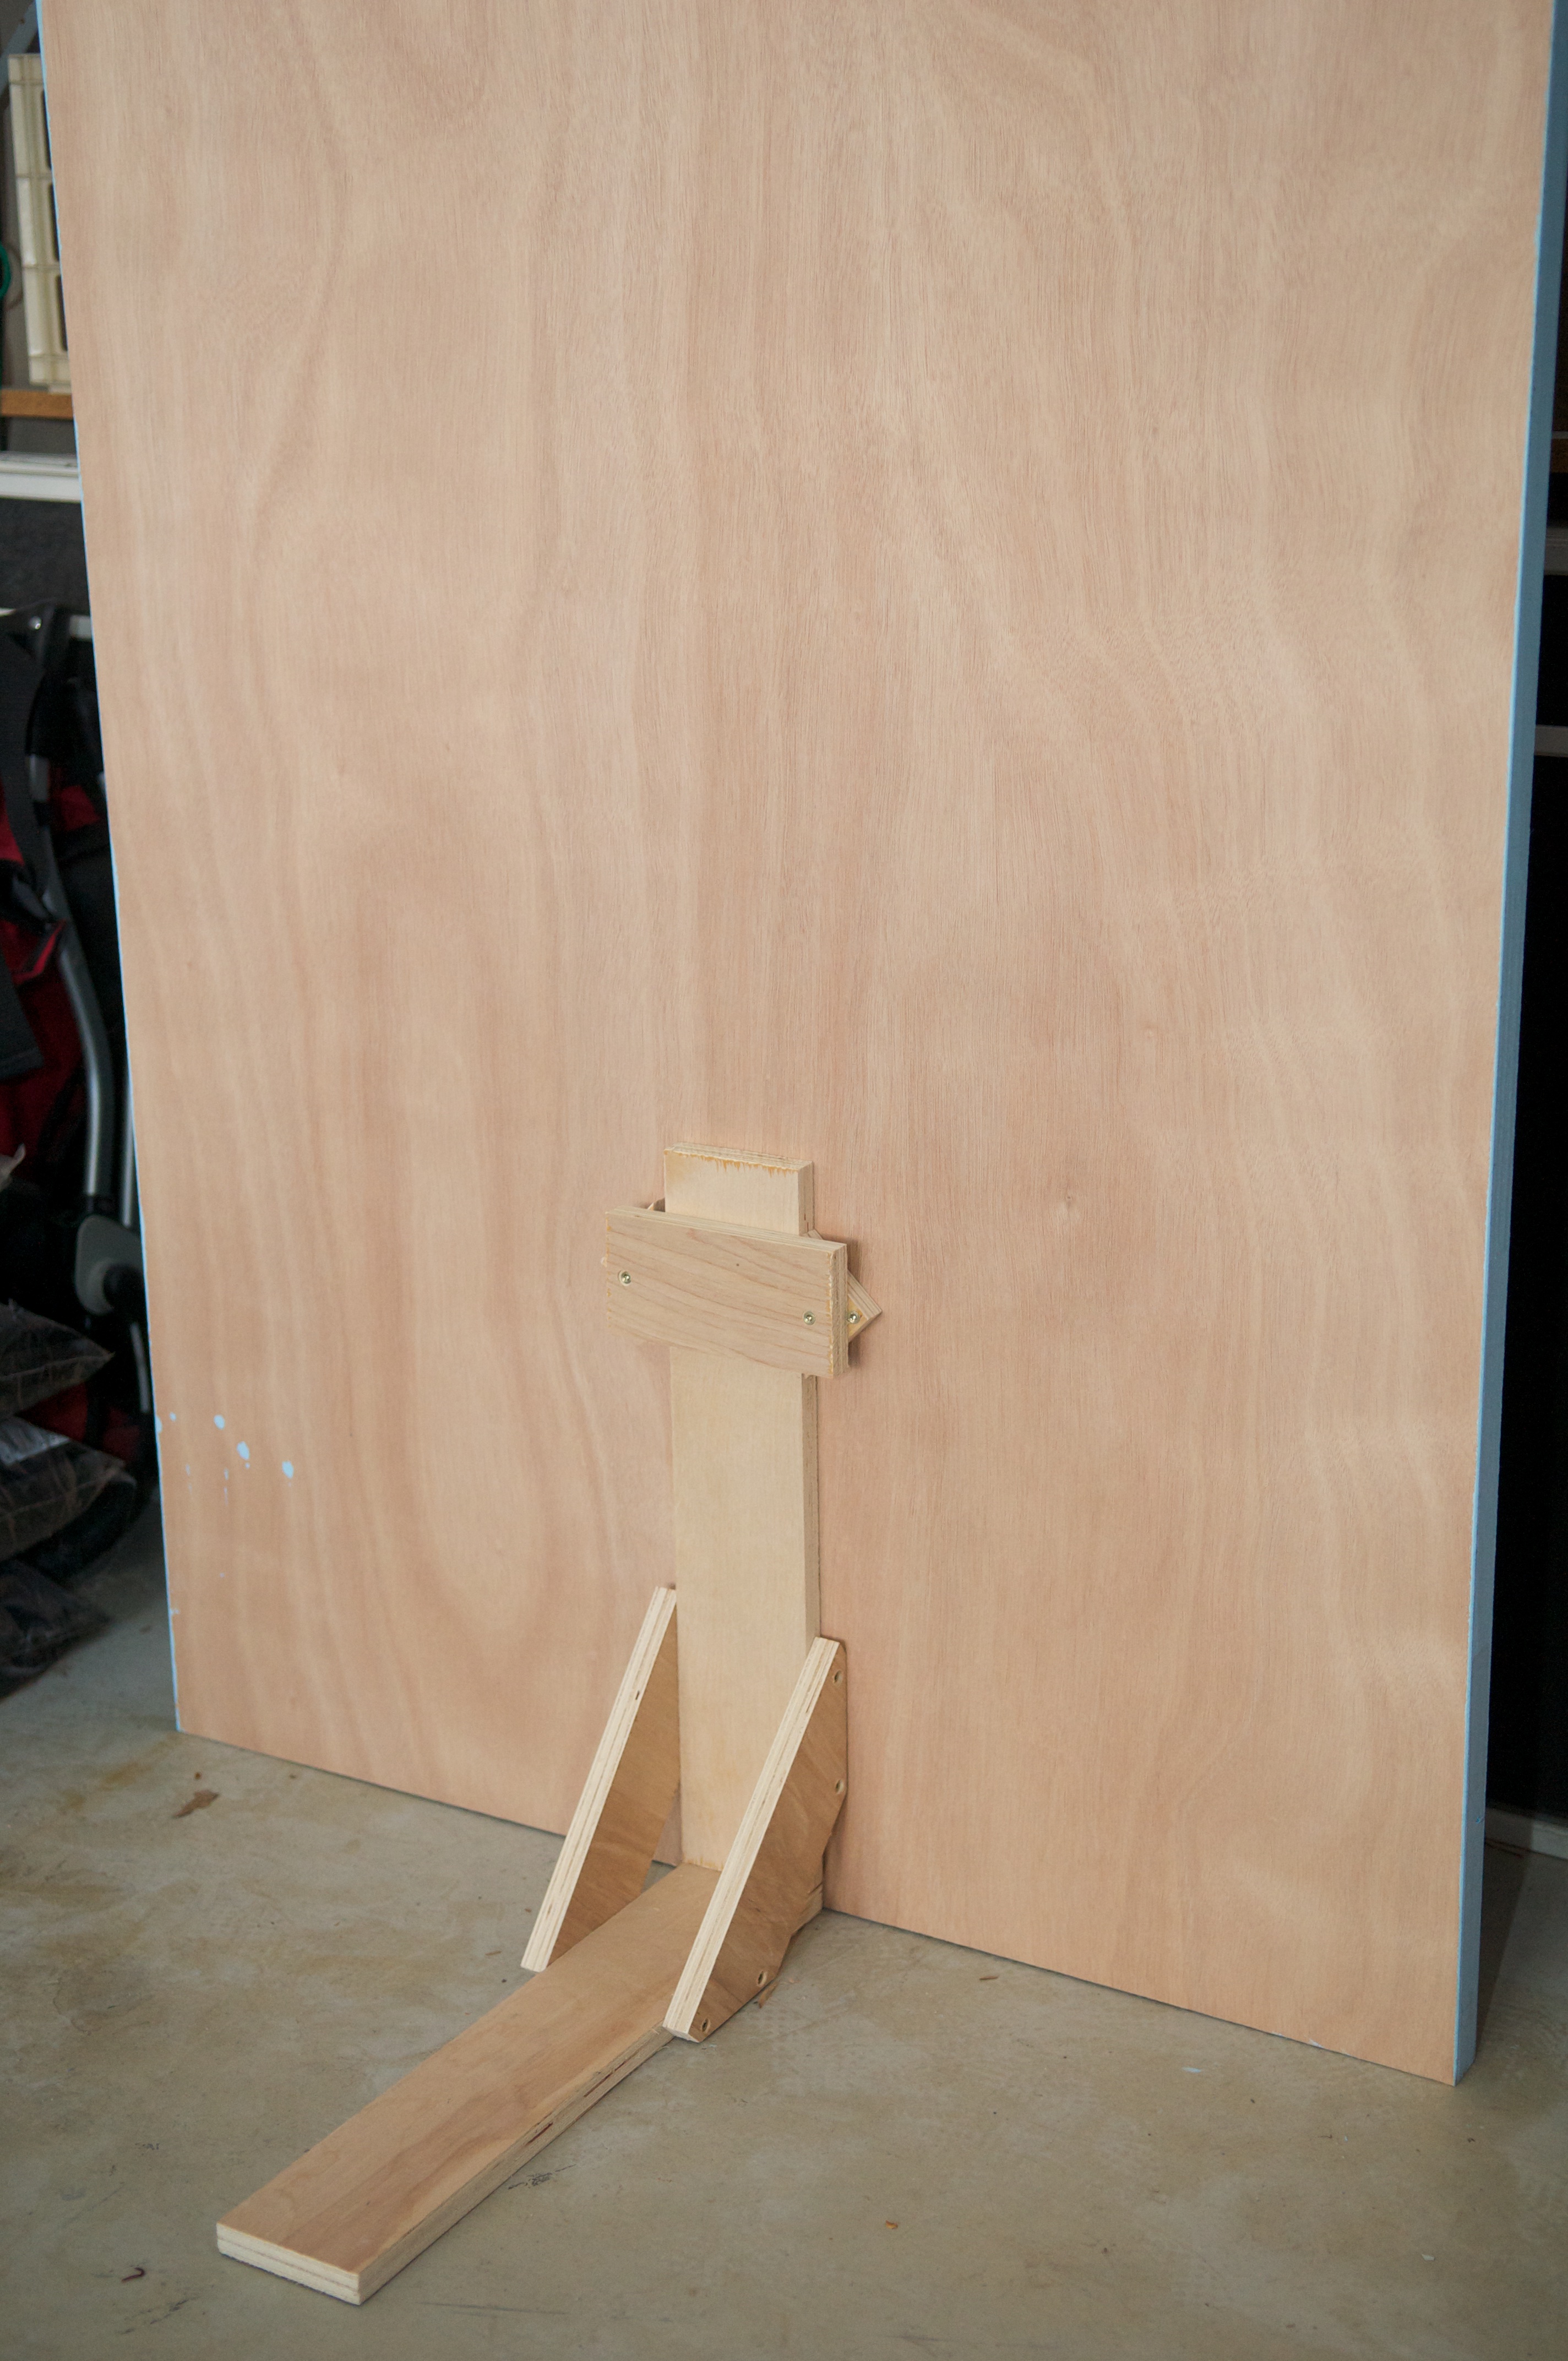 7) We did the rest of the prep for the wall at the bridal show. I don’t have any pictures of this portion of it, but we put velcro on the back of the crown molding on the top and bottom. We placed the walls side by side with the supports up to hold them up, using three heavy bricks to weigh down the supports. After the walls were up, we slowly lined the crown molding on the top to make sure it was even and did the same for the bottom. This made sure that the walls wouldn’t separate from each other.
If you look closely, you can see the seams of the doors, but they aren’t very obvious. Once the couch is in front of it, it’s not very obvious. The crown molding did a nice job of tying it all together both for visual appeal and function. We also used velcro for the canvas pictures to hold them up.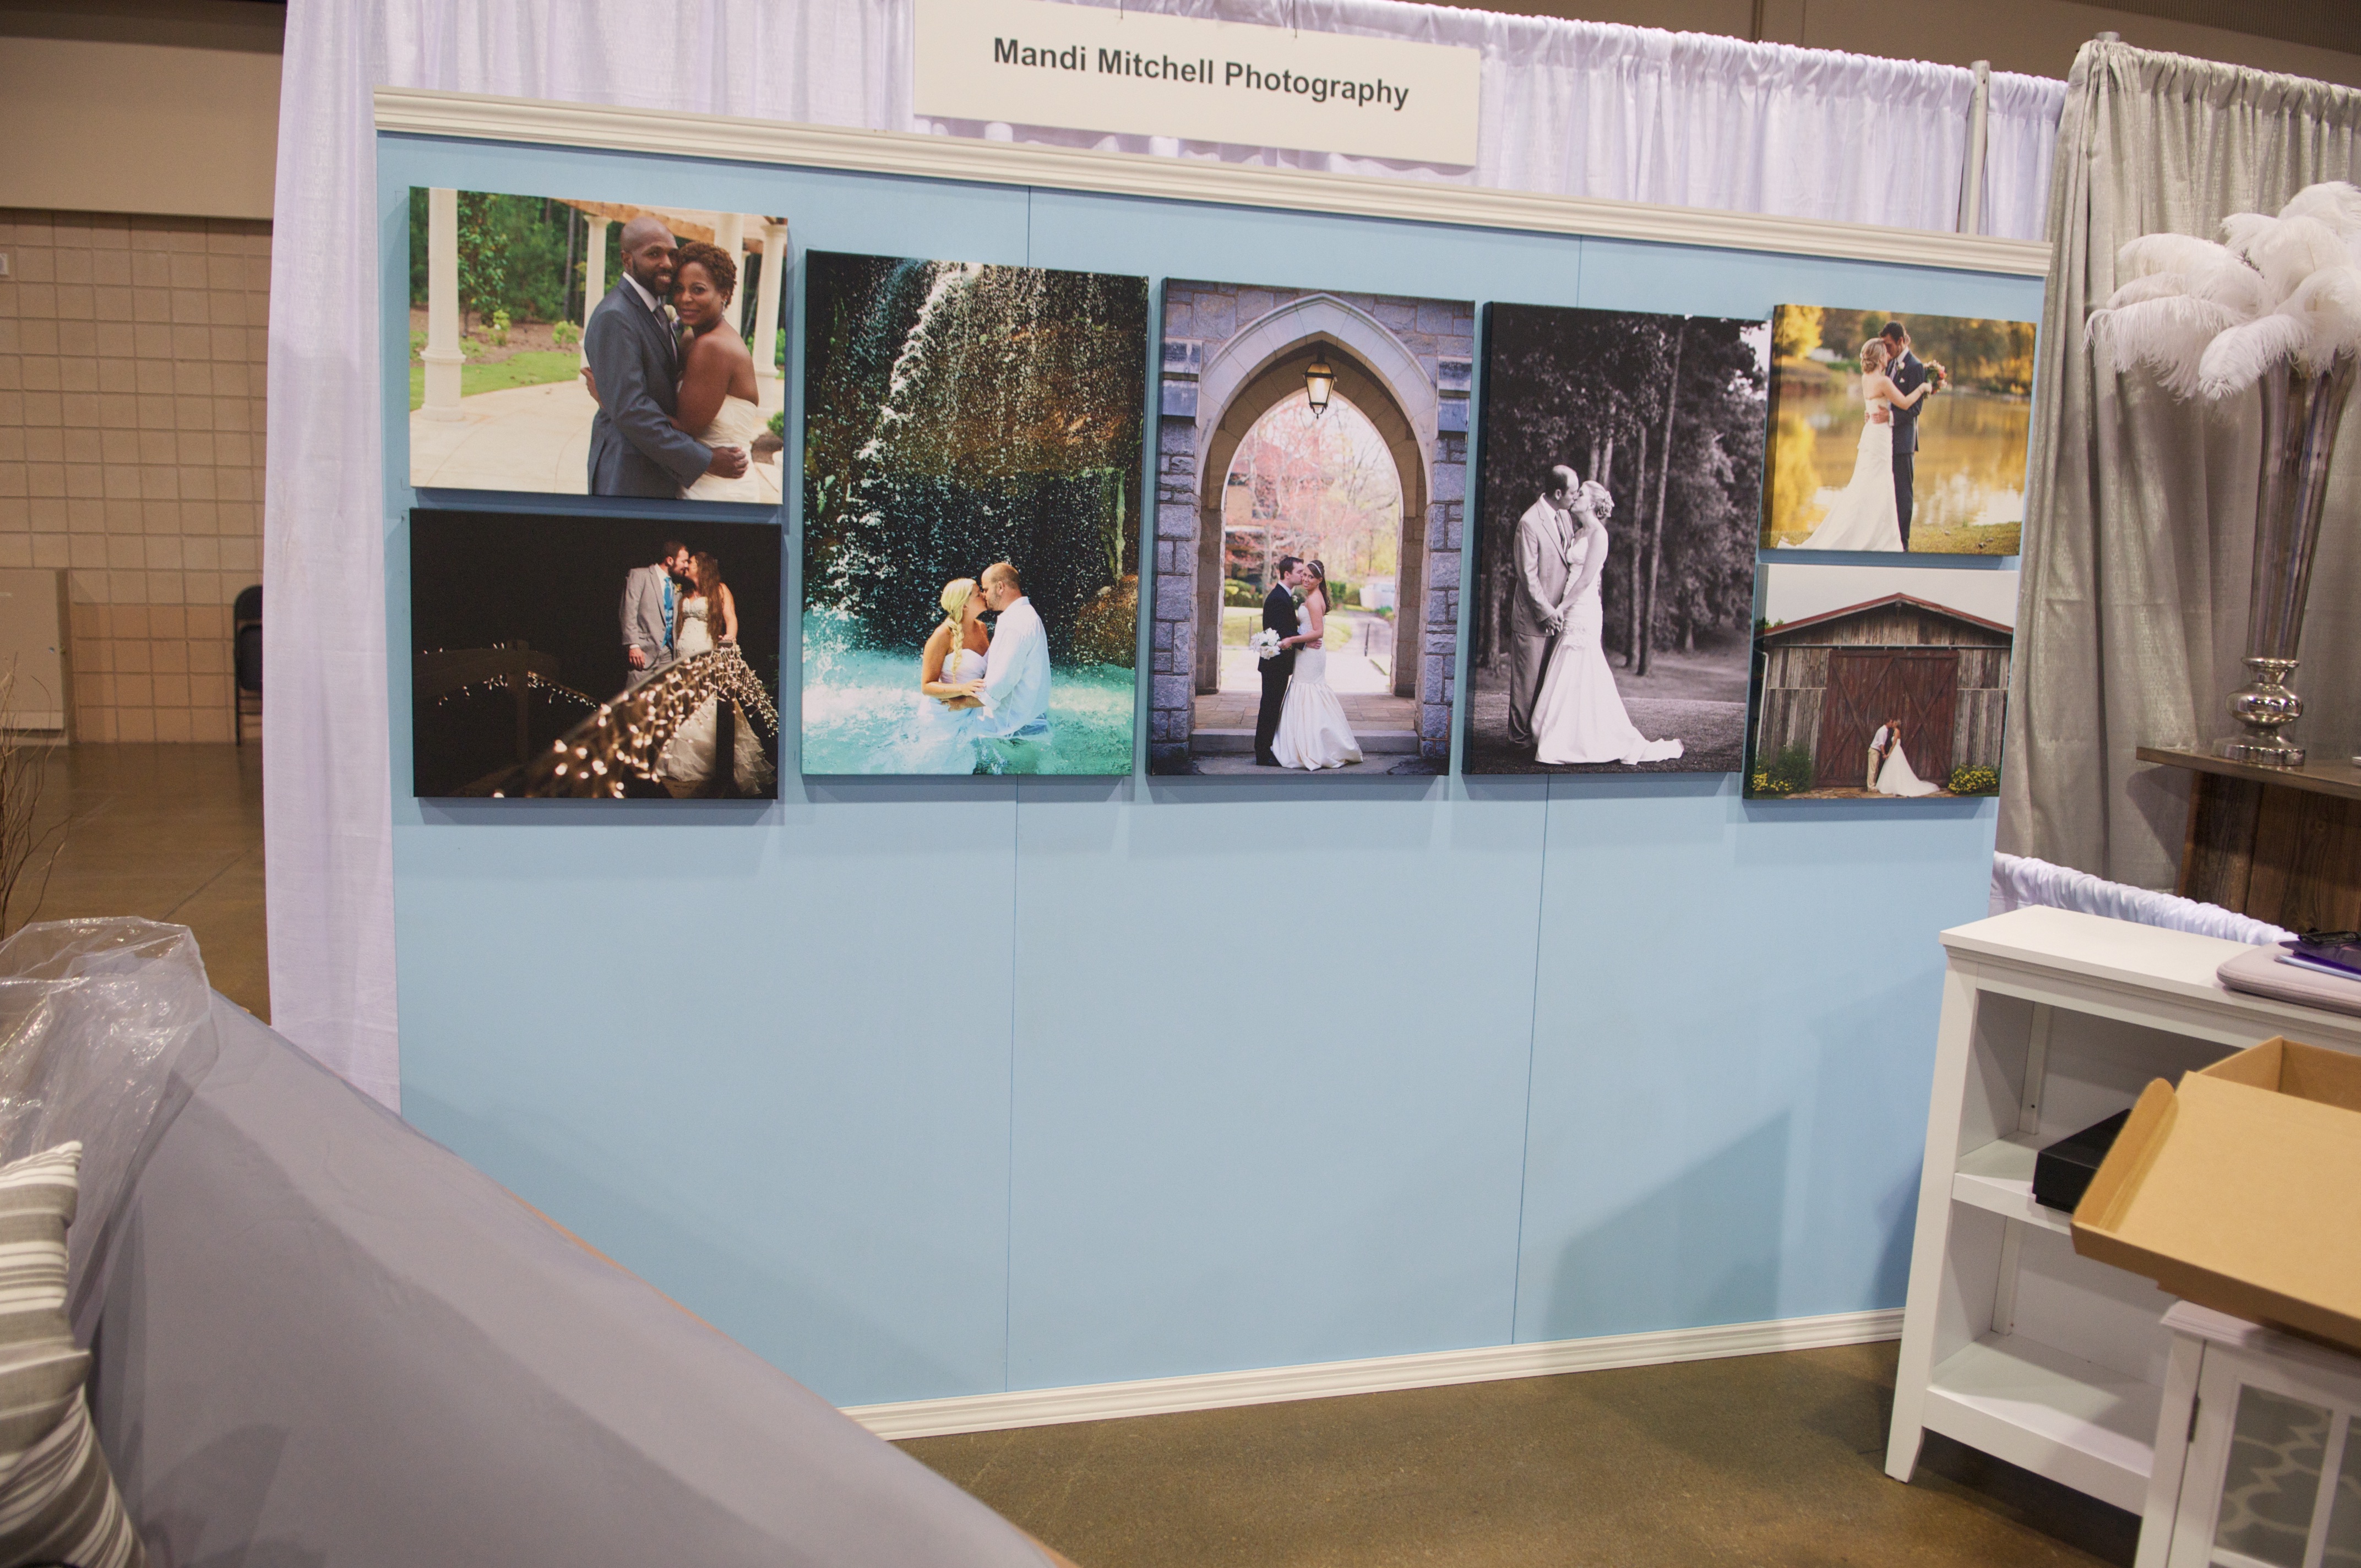
8) The final part (and maybe the hardest part) is figuring out what will go IN your booth along with your wall. Find some stuff that goes with your brand. If you look at my booth progression, my first booth had NONE of this; and as much as I loved my booths over the years, I never had a clear vision of my brand and what I wanted to represent when people saw me online or in person. I’ve finally got that vision, and I attempted some of that at the Cobb Show; but it took me getting to the Gwinnett Show to REALLY figure out what I wanted to do and how to make my brand speak through my booth.
If you look at it, you can definitely see my color scheme and know immediately that my colors are sky blue, grey, and white. You don’t have to go and purchase a couch or anything huge for your booth if you’re doing it for the first time or on a budget, but try and use what you have already in your home. I had most of what you already see at home. I bought the bookshelf and rug for this show.
Whatever you do, make sure it is welcoming and inviting to the brides. You want to wow them with the first look of your booth. You pretty much have less than a minute to impress them and a big part of that comes from presentation from your booth. Make it count!
Final product with furniture and props!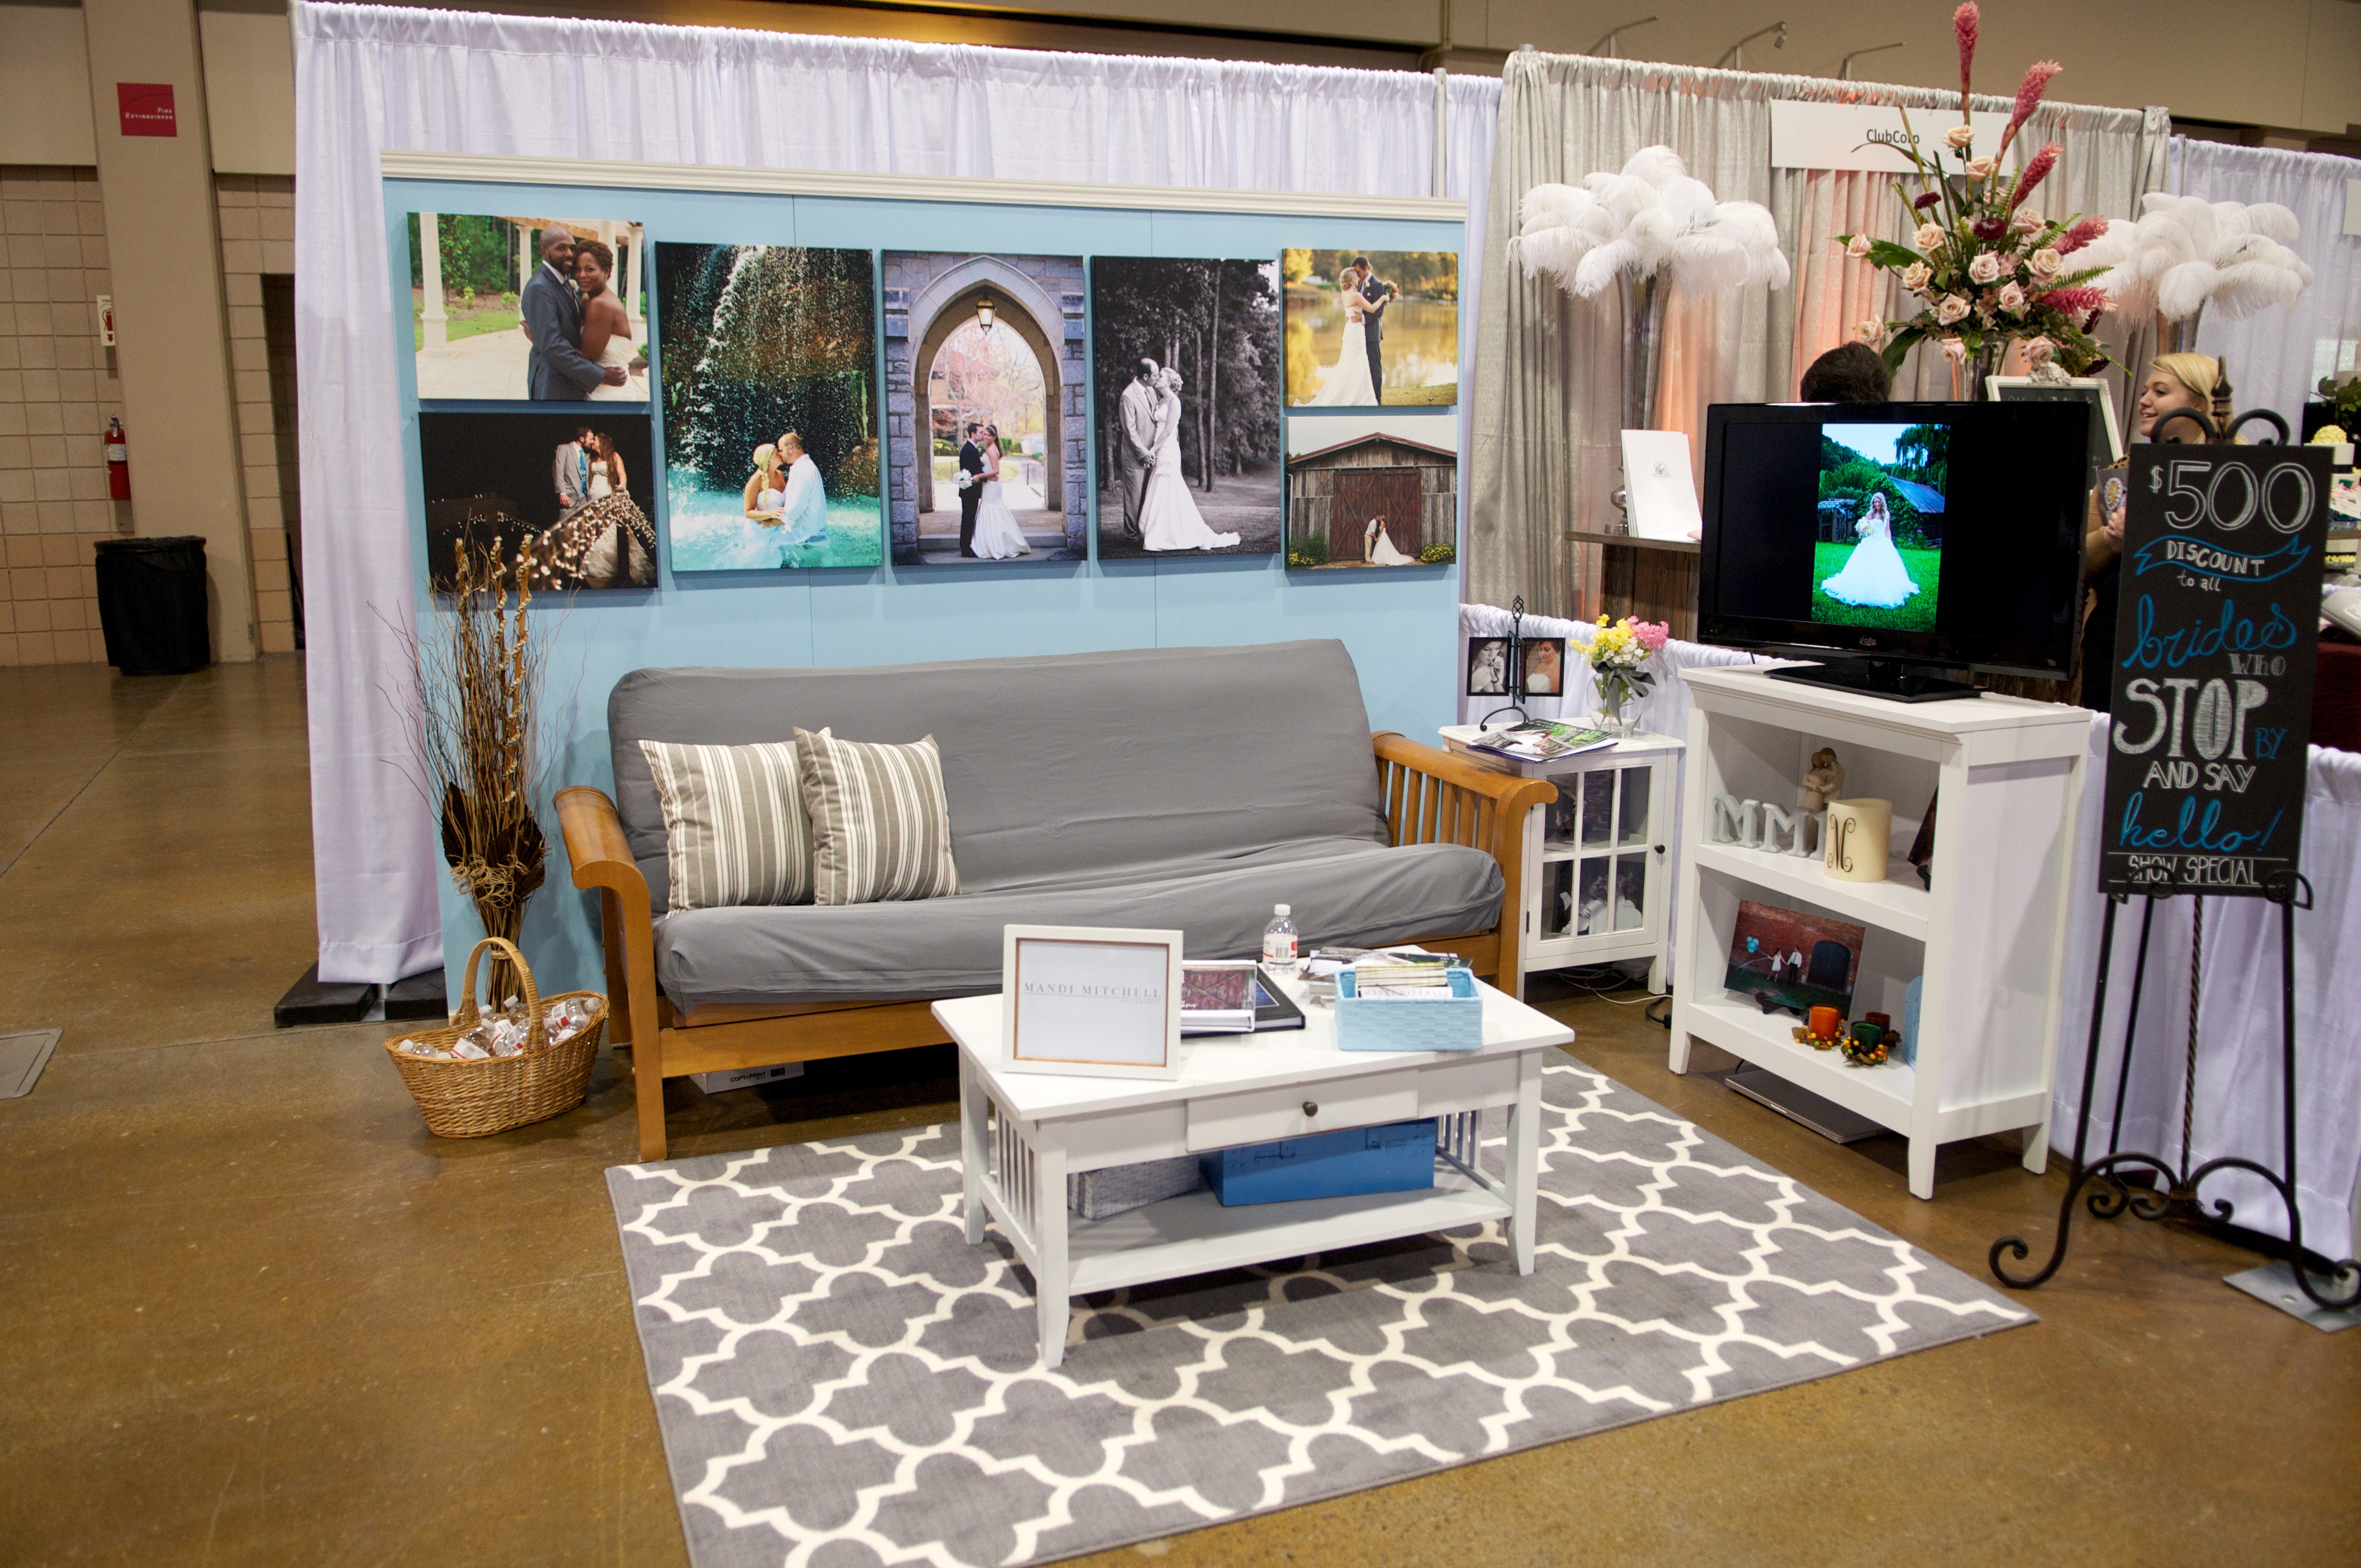
Good luck on making your own wall or a version of this for your future shows! If you create one using the information on this blog, make sure you reach out to me later and show me your final results! I can’t wait to see it and how your booth turns out!

Very informative- thank you for sharing!
Impressive Mandi! Your post almost inspired me to start wedding planning again! Almost…:-)
Impressive Mandi! Your post almost inspired me to start wedding planning again! Almost..:-)
very awesome! Thanks for this how to. You make it look really easy!!!
Thanks Amanda! I hope it helps you make a successful booth and that you do well!
Im actually in the process of making my now. Im stealing your Wall idea, but instead of 1x4s Im using 2x4s because its all I had. Ill have photos posted later!!!
Awesome! Best of luck! I loved the door idea for the wall. It was so simple and so easy to set up and take down. Plus it wasn’t that heavy! Make sure to share pics! I would love to see it!
Did you ever make your wall? I’d love to see pics!
That looks great! Do you mind telling me how much that project cost and what size your rug is? Thank you!
Not sure about the rug. I got it from Target. I think it’s like 4×6? As far as cost, do you mean the furniture and all of the stuff in the booth or just the wall? The wall was affordable and cost around $200 total for all supplies. The other stuff just depends on how much you want to spend on furniture and such. Best of luck!
Thank you! I was just wondering about the cost of the wall so you answered that question. Thanks so much!
Awesome! So glad to be of help! Did you ever make your wall?
I did make the wall! It looks great! Our show is on the 31st and I can’t wait to see it all set up! Right now I’m trying to decide if 3 16×20 black frames will look too small 🙂
Oh awesome! I would love to hear how it goes!! 🙂 I have 16×20 on mine, but I have the four of them + the 3 20×30 ones.
Hi, lm a contractor in la plata Md, I just made a bridal show booth for a client recently, Is there a market for bridal show booths? I thought about fabricating and selling them or renting them out.
I can provide some pics
I have no idea Doug! I think it probably depends on your market and where you live. There is a Facebook group for Bridal Shows for photographers and people post often about booths and walls they have made! Best of luck!
[…] who is interested in the setup of my booth, I used this blog to get my walls […]